How to use screen mirroring on iphone

Are you interested in mirroring your iPhone screen to a larger device, such as a TV, PC, or Mac? Whether you want to live stream, record your screen, or simply view your iPhone content on a bigger screen, we’ve got you covered. In this comprehensive iPhone screen mirroring tutorial, we will explore the best methods to accomplish these tasks. So let’s dive in and discover how you can make the most of screen mirroring for your iPhone!
To use screen mirroring on your iPhone, follow these steps:
- Ensure that your iPhone and the device you want to mirror to (e.g., Apple TV, smart TV, computer) are connected to the same Wi-Fi network.
- On your iPhone, swipe down from the top-right corner (on iPhone X or later) or up from the bottom of the screen (on iPhone 8 or earlier) to access the Control Center.
- In the Control Center, tap on the “Screen Mirroring” or “AirPlay” icon. It looks like a rectangle with an arrow pointing upward.
- A list of available devices for screen mirroring will appear. Tap on the device you want to mirror your iPhone’s screen to.
- If prompted, enter the AirPlay passcode or password displayed on the device you’re mirroring to.
- After a brief moment, your iPhone’s screen will start mirroring on the selected device. You can now navigate your iPhone, and whatever you do will be displayed on the mirrored screen.
- To stop screen mirroring, access the Control Center again and tap on the “Screen Mirroring” or “AirPlay” icon. Then select “Stop Mirroring” or “Disconnect” to end the mirroring session.
Note: The steps may vary slightly depending on the device you’re mirroring to. Some devices might require you to enable screen mirroring or AirPlay settings in their respective menus.
It’s important to mention that certain apps or content may have limitations on screen mirroring due to copyright or DRM (Digital Rights Management) restrictions. In such cases, you may encounter issues while attempting to mirror specific content.
Connecting iPhone to Mac via Lightning Cable

If you own a Mac, the first option is to directly connect your iPhone to your Mac using a lightning cable. By opening QuickTime and selecting “File” followed by “New Movie Recording,” you can access your iPhone screen. Be sure to trust the device on your iPhone if it doesn’t appear immediately.
QuickTime allows for automatic screen orientation changes, making it ideal for recording high-quality videos from your iPhone screen. It’s also possible to save the recording as a file on your computer or use it for live streaming purposes. However, keep in mind that you’ll need a Mac for this method and that rotating the phone during recording will interrupt the process.
Using Reflector or AirServer on Mac or PC

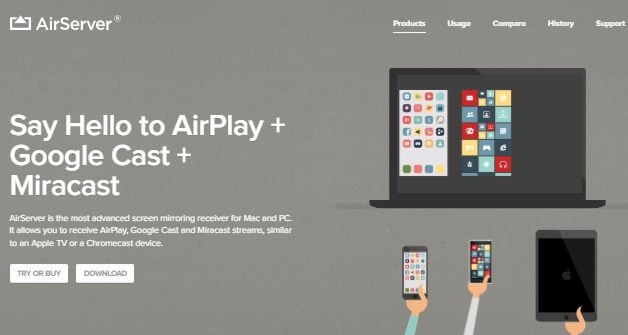
For both Mac and PC users, Reflector and AirServer are excellent software options for mirroring your iPhone screen to your computer. By installing either of these applications and ensuring that your phone and computer are on the same wireless network, you can enable screen mirroring from your iPhone settings.
This method provides flexibility as it doesn’t require a physical connection between your iPhone and computer. Reflector and AirServer also offer recording capabilities, allowing you to choose the recording format and quality. While the wireless connection might be less stable than a direct connection, this method offers convenience and the ability to connect multiple devices simultaneously.
Ecamm Live for Mac Users

Exclusive to Mac users, Ecamm Live provides extensive control and flexibility for live streaming your iPhone screen through your computer. Similar to the Lightning Cable method, you’ll connect your iPhone to your Mac, but this time, you’ll use Ecamm Live software instead of QuickTime.
Ecamm Live recognizes your iPhone as a video source, making it easy to incorporate your phone screen into live broadcasts with customizable settings. Additionally, you can use Ecamm Live for local file recordings with advanced features beyond what QuickTime offers. While this method requires a direct connection, it delivers the best quality results.
ScreenFlow for Mac Users
Another Mac-only solution is ScreenFlow, a comprehensive screen capturing, recording, and video editing software. ScreenFlow allows you to record your iPhone screen while synchronizing it with webcams or your computer screen. This makes it perfect for creating tutorials, courses, or showcasing apps on your iPhone. By connecting your iPhone to your Mac via a lightning cable, ScreenFlow recognizes it as a recording option.
One of the most powerful features of ScreenFlow is the ability to record different video layers, giving you the flexibility to create picture-in-picture effects or adjust video sizes during editing. Although ScreenFlow lacks a live preview during recording, it compensates with its advanced editing capabilities.
Summary
Mirroring your iPhone screen opens up a world of possibilities for live streaming, screen recording, and enjoying your content on larger devices. We explored various methods, including direct connections and wireless solutions, each with its own advantages and considerations.
Depending on your needs and preferences, you can choose between options like QuickTime, Reflector, AirServer, Ecamm Live, or ScreenFlow. Experiment with these methods to find the one that best suits your requirements, whether it’s for professional purposes or casual enjoyment of your iPhone content on a bigger screen.


